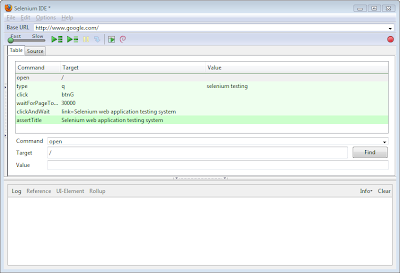
Selenium IDE is much simpler and can be used only on firefox. Selenium RC lets you to write much complex scripts using the programming language features. And you can mention the browser on which you want to run the script. Selenium RC supports Internet Explorer, firefox, googlechrome etc.
You can use any IDE for developing your scripts but I like using Eclipse. I will be explaining later how to use Eclipse.
Ok...so lets start creating the Selenium RC script using TestNG. You will need to install the following first.
Install the below
1. JDK : You can be download it from here http://java.sun.com/javase/downloads/index.jsp. Set the classpath.
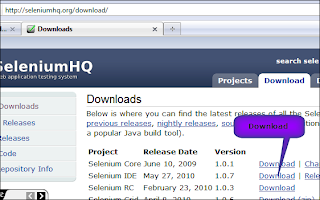
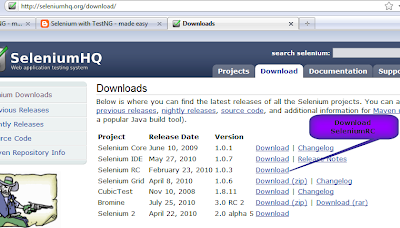
2. Selenium RC: Download it from here: http://seleniumhq.org/download . Extract the files in a folder named SeleniumRC and rename the selenium-server to JavaServer (it would be easy for us to use later).
3. TestNG : Download TestNG from http://testng.org/doc/download.html. Unzip. The files will get extracted to a folder called testng.
4. Eclipse : Download eclipse from http://www.eclipse.org/downloads/.Choose the "Eclipse IDE for Java Developers".Unzip the downloaded file. The files will get extracted to a folder called 'eclipse'.
5. TestNG plug-in for Eclipse: Start Eclipse by clicking the eclipse icon in the eclipse folder that's mentioned earlier. Click on Help->Install New Softwares. Enter "http://beust.com/eclipse/" in the "Work With:" and press Enter. You should see TestNG. Select it and then press Next till you reach Finish. Restart Eclipse.
Good that we have finished installing everything that we needed to start with selenium and TestNG. You could always work with selenium and testng without eclipse in which case you wont have to install Eclipse and the TestNG plug-in required for eclipse. But its better to have an IDE (like Eclipse or anyother) so that its far easier to write the scripts.
Let's start with the SeleniumRC and TestNG script now:
1. Open eclipse. Start by creating a new project : File->New->Java Project. Give a name say 'Automation'.
2. Add the required jars. Select the project-'Automation' , right click Build Path->Configure Build Path. Click Libraries->Add External Jars. You will have to add the testng and selenium jars.
3. Create a new package in the project. Select the project -'Automation' and then right click New->Package. Give a name say 'First'.
4. Create a new java program. Select the package-'First' and then right click New->Class. Enter the name as say 'GoogleSearchTC'.Press Enter.
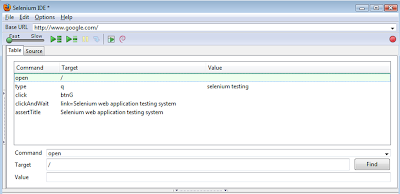
5. Now go to Selenium IDE and open the 'google.html' script which we had created in our first blog- 'Starting with Selenium IDE'. Click on Options->Format->Java(TestNG)Selenium. You can see that the format of your test case is now changed.
The format is in the testng format now. Your script would look like below:
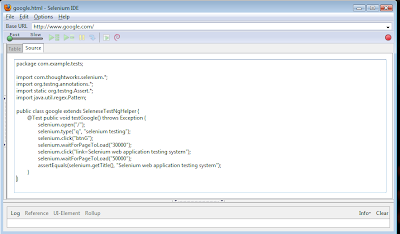
6. Copy paste the whole code into eclipse(GoogleSearchTC). You can see some errors.
7. Make changes so that your testng script looks like below:
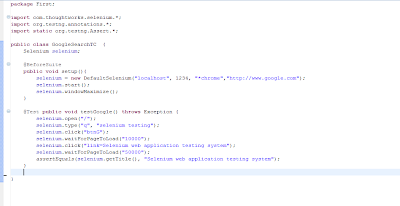
Great!!!!! Your first testng script is ready to be run. Wasnt that easy?
8. Start your selenium server. Go to command prompt and then go to SeleniumRC/JavaServer folder (where you installed selenium rc). Type in
java -jar selenium-server.jar -port 1234
This is assuming that the port 1234 is free. You can give any other port number if 1234 is being used. Just ensure that the port num given in the testng script matches with the port num used to bring up the selenium server.
Your command prompt screen should look something like below:
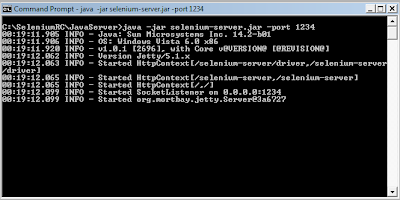
Your selenium server is up and running now.
9. Now run the testng script by going back to eclipse. Right click on the testng script. Click RunAs->TestNG Test.
Your script should run successfully.

